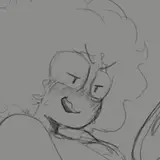
Don't watch it when you want to keep the illusion! You will see all the skin blemishes of the unretouched photo in full size and this is not as beautiful as the finished version. So, if you want to keep up the illusion of a spotless young girl, please just skip this post and don't watch the video.
Trigger warning: the nervously and rapidly moving cursor/tool shape can disturb sensitive people. The enlarged visibility of strong skin blemishes might disturb your feelings.
The video explained:
I've already selected the images from this session that I want to publish. I've adjusted the colors and contrasts from the RAW files using Canon's tool and copied the results to the open-source-program "digikam" that I use to manage my photos and to do simple tasks that affect the complete image like rotating or cropping. After those basic works I stark to retouch the images. So at the start of the video you see my screen with digikam opened, showing the photos with which I will work.
I select the image I want to retouch and open it in Gimp, the open-source photoshop (you might remember that I work with a Linux system).
I use a technique that is called "frequency separation". In principle this is separating the color information from the structure information (the pores, hairs, details...).
To get those separations I copy the image twice in two new layers. One layer will be the "color info", I select this layer and blur it a bit. This will already remove some of the smaller blemishes in the color part. Then I make another layer that I set to "grain extract". It contains the structure details. I move those two layers into a layers-group, so that later I can switch on/off the visibility of both "retouching layers" with one click and check the difference of the original (the underlying layer).
Now begins the retouching. I will first work only on the blurred color layer. You can see that the "color" layer is active, which means that although I see the combination of both layers, actually I only working on one of them. Here I can remove blemishes, but the structure, the hairs, will remain unchanged in the other layer. I use a tool that is called "healing brush". It copies a part of the image and then merges it softly to where I want.
I go through all the image, part by part, and retouch all the blemishes, one by one. Most of the time I display the combination of both layers (this will be the finished image). Sometimes I just display the color layer and work directly there, or I switch on/off the other layer to see the effect more clearly.
Now when I have retouched the color-layer there are still some blemishes visible, because apart of a color difference they also have a structure difference and thus are in the structure layer. So I activate that layer and retouch those parts in that layer. Here I must work even more careful, because here I could destroy information I want to keep - especially pores and hairs. I must change the tool size sometimes to correct just a small detail without affecting what's around of it.
In the end I go through the whole Image showing/hiding those two retouched layers. When I hide them, the original image is visible and I can compare the photo with the result of my retouching when I display the layers-group. I check if I lost some important details, if I forgot to remove something... and sometimes do this before/after comparison several times for a part of the photo.
Finally I save the image in xcf-format, which is Gimp's own file format that can preserve the layers, so that in case that I need to (when later I see an error in my retouching) I can continue to work with them. I save a second copy in png-format, which is a loss free compressed file format in contrary to jpg, which compresses the images losing some information with every saving.
I close the image and am back in digikam, where I will select the next image and do the same procedure again...
That's where the video stops.
Well, a long text and I have no idea if there is somebody is here who is interested in such technical details. But here they are, and I hope this background information, and the video showing "the complete truth" will be of interest at least to some of you :-)
Daniel Bauer
2022-02-18 09:06:37 +0000 UTC