Overview
Char Lib
Found and used the same standard in Blender to store characters' assets for easy editing/remixing/creating in the future,
including the body mesh, rig, and bake tools;
and rigs, bodies(eyes, brows, lashes, mouth, hairstyles), and clothing assets.
CharLib_v02_t07_Packed.blend
Design Tool
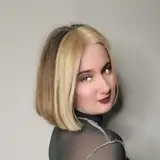
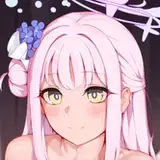
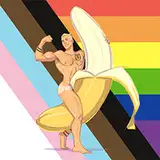
Trained some LoRA for Stable Diffusion,
tested and found the suitable settings to generate designs of nude bodies, faces, clothing, hairstyles, and mechas,
for both mesh alignment and texture projection, working with the character library to generate characters quicker and better.
Chamber Creator Profile | Civitai
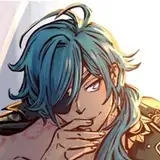
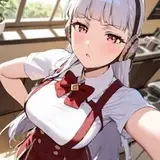
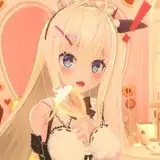
Vmod Ringo II
A character sample using the new standard but not using the design tools,
RingoII_v02_t08_Packed.blend
will update the virtual model Revna and Svend in the same way(improve their textures by design tools maybe, not sure, depending on the test results),
will combine the library tools and design tools to create an anime doll character soon, (bought a ball joint doll figure as a reference to improve the doll base mesh too)
also, will write down a guide during the creation and then post it,
but this time I am going to write their manual based on the outliner of the character library Blender project file and Satble Duffiusion Web UI elements one by one~
Feel free to contact me by joining the Discord Channel,
leaving a comment here,
or mailing to chambersu1996@gmail.com,
if any questions or anything here interests you~
I will reply ASAP unless I fall asleep, mostly in 12 hours~
Character Library
Collection "CharacterOriginalData",
mostly I save the original characters' data created on other Blender project files here temporarily,
to convert them to standard form, I deleted them before uploading them to save space.
~ Camera "CameraForDesignTools", (CameraForBodyI2I, I tweak some names to make them clear to understand before screencap when writing this post, the same below~)
mostly render images from this camera to work with the design tools,
created a sample collection and its instances below:
Collection "MeshTool"
~ Mesh "GetShapeByUVAndSurfaceDeform",
Used the base UV Map from an open software named MakeHuman as a bridge,
to transfer all body meshes under MakeHuman standard as shape keys into one mesh "MHBodyLibContainer",
Please look at the modifiers of it, the Geometry node "UVShape" can force mesh to unwarp as UV shape based on the param "Factor",
then two mesh have the same UV shape can transfer their original shapes by a surface deform modifier,
also, some tricks to keep the topology by replicating the mesh, applying the modifiers, joining as shape keys, and faces to tris to make sure the surface deform modifier works well on the good-topology container mesh then save as Shape Key,
will detail it further in the next post as a guide about how to use them step by step.
Collection "RigTool"
~ Armature "Basic",
the basic rig from MakeHuman, also suitable for Game Engine like Unity Humanoid, UE5 (with retarget settings), and Mixamo (free mocap/animation clips library by Adobe, disable the materials "Use Nodes" before export .FBX from Blender then upload to Mixamo),
all character rig are copy rotation from basic rig in this library (to align pose).
~ Mesh "JointPositionAndBoneRoll"
According to the shape key deformation of the body shape container mesh, it will guide us to find the bone joints' position and bone roll angle by a SurfaceDeform modifier,
will detail how to use it step by step in the guide post.
Collection "BakeTool"
Design for baking shaders on high-poly body meshes (MakeHuman basic topology) as PBR textures(Base Color, Alpha, Roughness, Metallic, Normal, Emission) of low-poly meshes (customized topology for game engine I name it "Avatar")
~ Mesh "BakeToAvatar"
the target mesh (Avatar topology),
looks like a cage to cover all the source mesh for baking high-poly and shaders' details to PBR textures,
~ Mesh "MakeHumanTopologyForShrink"
for the Shrinkwrap modifiers of the target mesh only
~ Mesh "ShadingOnMH" (TexOnMH)
the source mesh,
its material node tree contains all MakeHuman-standard shaders,
and the workflow/tools nodes to shape a MakeHuman body,
will detail how to use them step by step in the guide post.
Collection "Asset" - "RigLib"
All finalized body rigs are saved here. (Personally prefer force T-pose and apply then export for engines easier animation retarget)
Collection "Asset" - "BodyLib"
~ Collection "BrowLib"
curve-based high-poly brow meshes and baked brow card meshes here, combine/mask/deform the curve then bake them to create more variety.
~ Collection "LashLib"
curve-based high-poly lash meshes and baked lash card meshes here,
combine/mask/deform the curve then bake them to create more variety.
~ Collection "MouthLib"
teeth, gum, and tongue meshes here, will add more later.
~ Collection "HairLib"
create proxy hair mesh to describe the hairstyle shapes,
then generate hair cards by the Hair Tool add-on,
then bake/finalize them for the game engines,
I have rebuilt the anisotropic hair card shaders from Hair Tool as PBR material on Blender-EEVEE (Material "VmodRingoIIHairCard") and will rebuild for unity URP/UE5 later,
we can use it in the future with the understanding of each input's influence, will be detailed later,
it is the only special shader/material for virtual models, the rest are normal PBR textures-driven shaders.

~ Collection "EyeLib"
eyeball meshes, Procedural Iris, and Sclera Shader I have used for years,
tweak their transformation and node input to get different variety,
then bake and finalize for engines
- Mesh "AvatarBodyLibContainer"
Avatar-topology-standard body shapes (stored as shape keys) and textures baked from MakeHuman high-poly mesh (stored as material nodes),
which are much easier to rig faces by FaceIt (mostly about fewer vertexes to edit when correct AR-Kit shape keys), re-edit/tweak, and render.
- Empty "DollFaceNormalEditGuide"
Only use for Normal Edit Modifier to get more flat face normal for anime doll models.
~ Mesh "MHBodyLibContainer"
MakeHuman high-poly meshes (stored as shape keys) and Shaders (stored as material nodes).
Collection "Asset" - "ClothLib"
actually, I created clothing in a similar way to hair cards,
by creating cloth proxy meshes as pattern makings,
then import them to Marvelous Designers to simulate the detail mesh,
Then bake the high-poly shading meshes into Avatar-topology meshes,
but still something not sure here like the simulation detail meshes are too large to store in the Blender file directly, Avatar topology may not work with some kind of clothing, like a dress cannot align the legs topology...
need more ideas, tests, and improvements later
Stable Diffusion Web UI
My hardware as reference:
RTX 4080 laptop 12Gb VRAM
64 Gb RAM, i9-13900HX, 512 Gb SSD, Win 11,
VRAM is the most important I think, work on a local machine or use online services alternatively.
Follow this page to set our Stable Diffusion WebUI, or follow any guide/tutorial to run Stable Diffusion WebUI, or you can start with some beginner guide/tutorial first~
GitHub - AUTOMATIC1111/stable-diffusion-webui: Stable Diffusion web UI
When we can get such a page of SD WebUI above, then we can consider the checkpoints,
I recommend these after testing, please make sure the version is right, even the same checkpoint with different versions generates totally different things,
anime:
A.万象熔炉 | Anything XL - V5.0 | Stable Diffusion Checkpoint | Civitai
B.Counterfeit-V3.0 - v3.0 | Stable Diffusion Checkpoint | Civitai
C.animelike25D_animelike25DV11Pruned.safetensors · stb/animelike2d at main (huggingface.co)
D.MechaDream All-in-one - v1 | Stable Diffusion Checkpoint | Civitai
E.Mistoon_Anime - v3.0 | Stable Diffusion Checkpoint | Civitai
realism:
F.AbsoluteReality - v1.8.1 | Stable Diffusion Checkpoint | Civitai
G.Henmix_Real - v5c | Stable Diffusion Checkpoint | Civitai
H.Beautiful Realistic Women - v1.0 | Stable Diffusion Checkpoint | Civitai
I.ChilloutMix - Chilloutmix-Ni-pruned-fp32-fix | Stable Diffusion Checkpoint | Civitai
highly recommend testing and merging/training your own checkpoint to get a special style~
Here are mine, just use the average of my favorites:
25DAnythingCO3Mecha = 25% (A+B+C+D)
hen_abs181 = 50%(F+G)
BR10_Chi = 50%(H+I)
for SDXL, I think it is more controllable by prompt,
but SD1.5 works better with styles and is more good-looking,
and lots of LoRA have only a 1.5 version making SDXl lack some tool LoRAs,
cost much more time and hardware to generate or train,
So I went back to using 1.5 myself after testing SDXL, except for the mecha
but here is the one I recommend most now:
AbyssOrange XL Else - v1.0 | Stable Diffusion Checkpoint | Civitai
Then I use these Prompts below for designs,
DesignToolPost.zip
to copy the generation settings easier you can just put my generated images to the PNG info page and then press the "send to txt2img" button,
if you are familiar with Web UI you can read the information you need on the PNG info page,
paste all the words to the prompt space and set the seed as "-1" to make it generate random results instead of the same one all the time,
make sure the dynamic prompt add-on, wildcard, LoRAs, negative TI, and VAE are installed/loaded, most of them can be downloaded from Civitai: The Home of Open-Source Generative AI by searching their names/prompts.
Also, ControlNet is necessary for better results, mostly I use open pose, and put some of my generated images on Chamber Creator Profile | Civitai as input for special kinds of design you want.
Here is the summary but still seems too long...
but I will detail further step by step in the next guide post, aiming to record my workflows to easily repeat or learn from them~
Feel free to contact me by joining the Discord Channel,
leaving a comment here,
or mailing to chambersu1996@gmail.com,
if any questions or anything here interests you~
I will reply ASAP unless I fall asleep, mostly in 12 hours~