I've written extensively about this subject through several different posts, from anatomy to expression, yet I could not share a single post that condenses all the key ideas behind creating faces, so in today's post I'll be sharing them from the beginning of my Patreon up to today, along with linking the original post in which I developed each idea deeper for you to dive in. Subscribe and unlock this today!
How to Start - Study

First things first, you cannot create out of imagination if you have not registered that information in your mind through practice. Here are some keys to approaching studying for you to give your first steps.
Focus on one deliberate sketch daily after quick studies, targeting a specific skill like shading for meaningful progress. (from Practical Steps for Smarter Art Learning)
Define one subject category like shapes, gather 7-21 references ahead, focus on one technical level such as line art to isolate and address mistakes. (from Step-by-Step Guide on How to Start Practicing Art (My Efficient Way))
Create a schedule for studies, like weekly references for face expressions, to track progress and maintain consistency. (from How to Practice! - A Solid Plan To Improve Your Art in 2024)
Use references for gesture and anatomy, then stylize by exaggerating shapes and adding props or animals for character design practice. (from How I Practice Character Design Using References)
Select references based on skill goals, like anatomy for drawing or lighting for painting, and start with simple intuitive sketches without guidelines. (from How I Pick References for Study!)
Integrate creativity into studies by adding simple elements like a hat to anatomy drawings to transition toward original art. (from Trapped in Study Mode? Steps Towards Original Art)
Draw a reference face from memory multiple times, simplifying lines each attempt to build visual memory for imagination drawing. (from This Is Why You Struggle When 'Drawing From Imagination' - My Solution!)
Make random brush strokes on canvas, identify familiar shapes, outline them to practice recalling visual memories from imagination. (from Creating From Imagination! - A Pattern Recognition Exercise!)
Set realistic goals, schedule 30-min daily practices on a focal point in references, share progress for motivation. (from No Progress in Your Art? A 5 Step Routine to Nail Any Skill!)
.
How to Address Anatomy - Anatomy

I know you want to go into expressive faces yet you struggle with the position of the eyes, the size of the head, or the shape of a mouth. This is because after you study, you must build some paths to get those proportions right and then play around with expressions. Here are some keys.
Draw eyes as split ovals: for high energy, arc top upward and bottom downward; for low energy, incline lines downward from center with half-hidden pupil. (from I Challenge You to Draw One of My Favorite Eye Styles: Step-by-Step Guide)
Use "one eye-width apart" rule for proportions; add one small bright light point between iris and pupil; draw both eyes together and flip canvas for symmetry. (from Making Eyes! 4 Essential Tips to Address Common Mistakes)
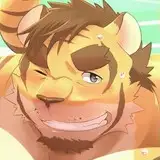
Draw male heads starting with straight line, modify shape (square, triangular, circular), incline for perspective, connect ends, duplicate for back, connect shapes, adjust jaw and features. (from [Tutorial on drawing male heads])
Draw female heads: straight line, curve half, incline for perspective, connect with oval curve to form bean, duplicate and shift for back, connect, adjust chin and head. (from New Challenge for Shapes! - Tutorial to Draw Female Heads With My Style)
Draw mouths focusing on vermilion border: closed as M line; smile with M top and curved bottom plus teeth suggestion; angry with inner curve and straight outer plus gum; shocked with open exaggeration. (from How to Draw Mouth In My Style - Anatomy Shape Exercise)
Draw noses using nasal root/bridge, tip, columella lines: pointy curved for females; straight for males; thick outward curve with split line; round merged curve for kids; add subtle cast shadow. (from How To Draw Noses Like Me (IT'S TIME TO BREATHE) - Anatomy Shapes!)
Build compositions intuitively from face outward, using top/bottom views; warp perspective fisheye-style for more info; simplify distant objects geometrically; start large and scale down. (from Tips To Improve Perspective In Your Art (Intuitive Perspective))
Observe details like curves in shapes; draw precise contours from references; use imaginary horizontal/vertical lines for alignment; simplify predominant forms for stylization. (from Tips To Develop Your Style - How To Study (Theory and Practice))
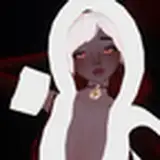
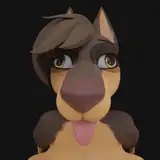
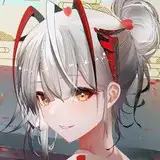
Practice contour drawing on human references to simplify anatomy into minimal lines, emphasizing expressive eyes and unique hairstyles for anime style. (from How to Create Anime Style Characters - Anatomy, Colors, and Shadows)
.
How to Make Your Characters Alive - Expression

You have your 1000 practices done, you know how to construct a head just right with all organs in check, yet your character feels lifeless, no emotion, no life. Don't worry, here are some key aspects to create that emotion out of scratch.
Observe and simplify expressions into basic lines (e.g., wide smile for excitement); sketch one emotion using references. (from My Secret Recipe for Expressive Characters: 3 Quick Tips for Artists)
Avoid neutral expressions; add specular highlights to eyes; keep pupils from touching eye corners for intensity; exaggerate body gestures in thumbnails. (from Making Your Art Alive: Tips for Creating Lively and Expressive Characters!)
Introduce wind to alter hair/cloth direction; depict characters talking or working; use hands touching elements; prefer lateral/top/bottom views. (from More Tips on Bringing Life to Your Art! - Dynamic Drawing)
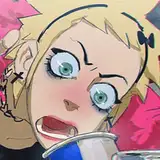
Break expressions into simple shapes focusing on eyes, brows, mouth; categorize into happiness (wide smile, raised brows), sadness (frown, tense brows), etc.; practice from observations. (from Express Yourself: Mastering Facial Expressions for Emotionally Engaging Art)
Use small pupils cut by eyelids for intense gaze; build anatomy with organic ovals/curves for dynamism; divide composition into front (large objects), middle (focal point), back (small elements) layers. (from Capturing Energy! Tips to Expression, Dynamism, and Perspective Depth)
Use geometric shapes for proportions (head oval, torso rectangles, limbs cylinders); exaggerate line of action curves for dynamic poses; apply perspective and shading for depth in features. (from Anatomy - From Static to Dynamic 3 Keys! + Exercise)
Draw one eye, duplicate and mirror; apply perspective transform to narrow closer eye, then scale to correct elongation; add pupils and adjust roundness. (from Simple Tip for Facial Expressions with Perspective (Eyes))
Search for themed references (e.g., lizards); define vibe, expression, fashion, action (e.g., eating), props matching reference for distinctive portraits. (from Learn How I Paint Portraits in Two Simple Steps!)
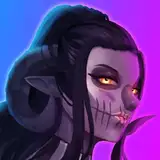
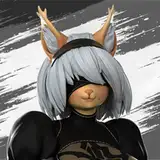
Define motivation (e.g., revenge for intensity); create relatable scenarios; choose functional outfits; match gestures/expressions to mood; contrast with other characters for uniqueness. (from Tips for Creating Characters with Personality!)
.
How to Keep the Energy While Adding Values and Colors - Painting

Most of what I've said so far is for the drawing phase of the process, as that's where most of my process consists when creating faces, yet after that, you might not know how to keep that energy while adding values and colors, so here are some useful ways to approach rendering in faces.
Define shape silhouette with lines; add multiply layer for hard-edged shadows based on light position; soften edges for volume; include ambient occlusion, highlights, and reflected light. (from Render Tutorial? Hellyeah! How to Shadow/Light/Values/Volume/3D/Paint)
Use top-right inside light for clear design visibility; top-left outside light for engaging shadows; backlight for mood; start shadowing with single stroke and refine shape. (from Light It Up! - 3 Key Techniques for Lighting (Concept Art & Illustrations))
Block base colors; add desaturated shadows in multiply mode, adjusting tone/value by surface (bright bases: cold/blue shadows; mid: darker saturated; dark: desaturated near-black). (from This Is How I Color Shadows: A Very Simple Guide (2min Read))
Start with desaturated bright base; add info (saturation/texture) to larger light/shadow areas; use warm shadows for bright skin, purples for dark; soften edges with textured brushes. (from How to Paint Skin - My 6 Recent Techniques)
Avoid detailed teeth (suggest separations subtly); minimize facial lines for youth/calm; skip nostril ala unless needed; erase upper lip line after coloring to prevent mustache look. (from Things I Avoid When Drawing Faces!)
.
One Last thing - Consistency

Whatever I'm telling you here, if practiced or done once, will lack meaning. A fundamental part of mastering every practical insight is repetition, you must consistently dedicate at least 1 hour of your day to address any of the steps previously mentioned. Don't expect things to get right the first time, but trust me when I tell you that the reason I get to this level is not because I'm a genius but because I've been consistently doing this for long periods of time.
If you plan to start your journey today, please join our Discord community and share your journey with us. Part of what keeps me motivated is the feedback from other artists, I'm sure that might work for you too.
If you find this compilation useful, make sure to check my Patreon catalog, in which you can also explore articles by their titles along with themes of your interest: https://ramonn90.myportfolio.com/work
.
You can now pre-order my book Life in Every Sketch on the 3DTotal shop.
https://rebrand.ly/The-Art-of-RamonN90

Please let me know if you have any questions, I’ll be happy to help with art advice or book details.
JuanchoStyler
2025-10-11 16:55:17 +0000 UTC