SamuKata
thestupendium
thestupendium

patreon


Number Go Up - Wallpapers!

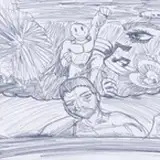
Here you go everyone, you’ve been dealt some Number Go Up wallpapers!

As the camera is basically constantly moving in Number Go Up, you might notice a fair few of these wallpapers have a bit of motion blur. Unavoidable I’m afraid, but I’ve tried to pick some of the least blurry images possible! Hopefully you can take a better look at some of the props and costumes that go by very quickly in the video.

You might also notice some of the images are a little overexposed (the whites look brighter than they should be). Well, we bought a very new expensive camera to take full advantage of all the features of our robot arm, Armando. But as it was very expensive, we bought it second hand. Clearly, we didn’t check the settings thoroughly enough, as a setting was enabled that meant a LUT was baked into the footage. (We don't know why they would want this... this is terrible...) Essentially, this means we had less control over tweaking the light and shadows of the video than we usually do. But hey, this whole video with Armando was a learning process – we know for the next one!

Another feature of this new camera (a Sony FX9 for those interested) is that it shoots wider than normal. The 4K on our other cameras is 3840 x 2160 pixels, but the this one is 4096 x 2160. I didn’t want to crop anything out, so these wallpapers are 4096 x 2160 for the large version, and 2048 x 1080 for the small version – which is 2K. The 2K are in the gallery above, and the 4K are in the downloads below. Enjoy!

~Liz

Number Go Up - Wallpapers! Number Go Up - Wallpapers! Number Go Up - Wallpapers! Number Go Up - Wallpapers! Number Go Up - Wallpapers! Number Go Up - Wallpapers! Number Go Up - Wallpapers! Number Go Up - Wallpapers! Number Go Up - Wallpapers! Number Go Up - Wallpapers! Number Go Up - Wallpapers! Number Go Up - Wallpapers! Number Go Up - Wallpapers! Number Go Up - Wallpapers! Number Go Up - Wallpapers! Number Go Up - Wallpapers! Number Go Up - Wallpapers! Number Go Up - Wallpapers! Number Go Up - Wallpapers! Number Go Up - Wallpapers! Number Go Up - Wallpapers! Number Go Up - Wallpapers! Number Go Up - Wallpapers! Number Go Up - Wallpapers! Number Go Up - Wallpapers! Number Go Up - Wallpapers! Number Go Up - Wallpapers! Number Go Up - Wallpapers! Number Go Up - Wallpapers! Number Go Up - Wallpapers! Number Go Up - Wallpapers! Number Go Up - Wallpapers! Number Go Up - Wallpapers! Number Go Up - Wallpapers! Number Go Up - Wallpapers! Number Go Up - Wallpapers! Number Go Up - Wallpapers! Number Go Up - Wallpapers! Number Go Up - Wallpapers! Number Go Up - Wallpapers! Number Go Up - Wallpapers!

Comments

I'm not an expert by any means, but I'll do my best! Most video cameras can now shoot in LOG (we shoot all our projects in LOG) which is a film format that looks very grey and desaturated, but captures a lot more information from the camera sensor. This means when colour grading the footage, you have a lot more control and are able to adjust more things like how light the highlights are, or how dark the shadows are. If you're not filming in LOG, the lightest highlights are just white, there's no colour data there, so you can't darken them. A LUT is like a colour preset that will change the look of your LOG footage. They are often used to make the LOG footage look more 'normal', like you would see with the naked eye - much more contrast and colour than the flat greyed out LOG footage. While filming, we will always use a LUT on the monitor so we can see how the video will look with a LUT applied, otherwise it's very difficult to adjust lighting properly. When editing, the first stage of colour correcting is usually to apply a LUT to make the video appear more 'normal', and then you can further adjust from there specifically to achieve the correct white balance, exposure, contrast etc. Then it would go to colour grading, which is the creative side, making artistic adjustments (we want this video to look dark and moody etc.) For this project on the FX9, the LUT that we thought was just the camera showing us 'hey, this is what your footage would look like with the LUT applied' (a standard camera feature) was actually baking it into the footage where we can't remove it, so we couldn't do very much colour correction while editing. There's no real reason to bake the LUT into the footage, unless maybe you're doing something really informal and quick, which you wouldn't use a Cinema camera like the FX9 for, so it was a setting we didn't really think to check! We're not making that mistake again though - that setting is off and is staying off! ~Liz

The Stupendium

Would you be able to expand on the bit about the LUTs? I've encountered the concept of palletized colour before (I still remember GIFs being limited to 256 colours) but I've no idea why it'd even exist as a feature in a context where you're putting out nearly 10 million pixels per frame and have 24 or even more bits per pixel to play with, let alone why the previous owner would switch it on. And it goes without saying the video itself is stunning, even if the colour isn't quite perfect. It's impressive enough having 7 of you in the opening shot, and then you blow it all out the water all over again with all the interactions between the characters. (especially with people coming out of the shadows for lines like "the rest rubberneck" with no discontinuity) (... Although I think the skull is visible for a few frames during the "meteoric" line before the camera moves over and it's held up?)

Ewan

Very nice to see the extra details! I hadn't tracked on the fact that Yorick explodes into poker chips.

Dinah from Kabalor


More Creators