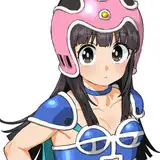
Yuffie is a character that I never thought I would cosplay- at least I figured I would make some other Final Fantasy cosplays before doing this one. But after playing the game recently, I wanted to add her to my 2019 projects. Great choice for me, since the remake has started ramping up with trailers and a release date.
I chose to use the original FF7 design as the main reference, mostly so it matched my Tifa and Aerith cosplays.
This cosplay was probably medium difficulty, as there are lots of small parts. Hopefully this helps you create this costume!
Materials
ImageJ
This is a program you can use to scale your props and armor! I used it to get measurements for my Shuriken as well as measure my shoulder pad.
https://imagej.nih.gov/ij/features.html
Shuriken
I asked my friend Dee to 3D model Yuffie's shuriken for me. It comes apart for travel and is scaled to match my height. You can check her out here:
https://www.instagram.com/ninjadeelee/
https://twitter.com/NinjaDeeLee
I printed my shuriken on my CR10-mini out of PLA. Once it was all printed, glued the center parts together and filled the gaps with wood filler. I sanded any really nasty bumps (thankfully there weren't many) and primed it with a few coats of wood glue until smooth.
Then I painted everything and glued my 4 materias I casted to the empty areas near the shuriken middle. I sealed it and it was good to go.

Casted Materias and Gems
Yuffie has orange gems on the back and front of her shoulder. I printed out a gem from Kinpatsu's gem files and sanded it smooth. Then I used silicone to make a mold to cast the gems in resin.
I dyed the resin with acrylic paint to get the opaque look. I also did this for the materia on the shuriken.
I glued them on their respective parts with E6000 glue.
Shoes and Socks
I bought some cheap tan hiking boots that looked like Yuffie's and painted them orange with some leather paints. Similar to how I did my Tifa boots.
The socks in the art look like those scrunchy socks that Japanese school girls wear sometimes. I decided I wanted to do something like that for the socks.
I made a sort of triangle tube that was longer than I needed so the socks would scrunch. I also put elastic on the bottom so the socks would stay around the top of the boots. I airbrushed some shading on the seams as well.
The socks stay up with fashion/body tape.

Fishnet Sock and Glove
I bought some fishnet thigh high stockings and used one for the legging. I sewed some velcro on the front so the leg band would stick.
For the glove, I sewed the second stocking smaller so it would fit on my upper arm. I cut the bottom of the stocking as well so it was shorter. I also sewed a piece of velcro on top of the band so the bet and foam armor piece would stay on.

Leg and Arm Armor Parts
The leg band looks like a metal cuff so I decided to use 5mm craft foam to make the base. I glued 2mm foam details on as well as googly eyes for rivets. Once it was built and fitted around my leg, I primed it with a mix of wood glue and modge-podge. Then painted it. I glued some velcro to the inside of it so that the foam band would stay around the fishnet sock.

The pleather details were made of grey pleather that I weathered with some leather paint. I glued the pieces on with fabric glue. The belts attach to the bottom of the shorts to keep everything in place.
For the upper arm band, it was the same process of making the metal part from foam and gluing it to the pleather belt I made for it. There is also velcro on the back of the foam piece to make sure it stays in place.

Shorts
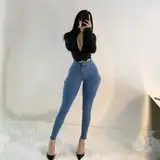
I bought some white denim skinny jeans with the intent to dye them with tan Rit dye. Before dying them, I cut them shorter, but not too short as I wanted to hem them to match the artwork,
Follow the dye directions and cut a test strip from your left over fabric (if you bought shorts and don't do any alterations make sure you are 100% sure you want to dye them). Use the test strip to make sure the dye is the right color. If it is, dye your shorts and rinse them in the washing machine and hang to dry.
My dye was not right. I ended up dying the shorts with black tea. Since denim is a natural fabric, tea will stain it. I used 5 tea bags and enough boiling water to submerge the shorts. I checked and stirred it until I was happy with the color. Then I threw them in the wash and hung them to dry.

The last step was heming the bottoms and sewing the grey belts that attach the legband on.

Gloves
The orange gloves were made by tracing out my hands on pleather, then sewing the pleather to a stretch fabric. I weathered them with leather paint. The grey armband was just glued on. The foam armor bit was made the same way as the rest of the foam armor.

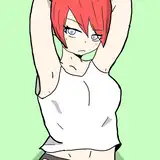
Shirt
I used one of my own crop tops as a pattern to make the shirt. It was really easy!

Harness
I made a pattern using my dressform. Once it was cut out, I traced it on to my grey pleather, making sure it was double sided. I sewed both pieces together and cut slit on the underside of the harness so it would flip inside out. Once flipped inside out, I stitched it down and sewed up the armhole. Then I made a sort of pleather bias and stitched it around the armhole to make it look neat. The collar part was sewn on after.
The belts were stitched in place and measured. I made the belt holes with a cheap hole punching tool I got from amazon. The harness was weathered with leather paint and the rivets were placed on. They sort of poke through and are pressed down like a brad.

Shoulder Pad
I used imageJ to get measurements for the shoulder. I cut out two pieces of 5mm foam and glued them together. I used a heat gun to help shape the foam. Details were done with 2mm foam and googly eyes.
Once the should pad was build, I primed and painted it. Then I added the green tie and glued down the orange gems to the front and back.
Then glued velcro on the inside and velcro on the harness. This is how the shoulder pad stays on. Make sure the shoulder sits correctly before glueing and sewing down.

Puffy Sleeve-Thing
I honestly have no idea what it is. It's the strangest part of the design.
I measured the length of my arm and the length of the shoulder pad where it would attach. I cut two pieces of fabric and 1 piece of batting. I darted the bottom of the sleeve so it would curve a bit. Once all 3 were cut out, I glued batting onto the wrong side of my fabric. Then I sewed the other piece on and flipped it inside out. After checking the fit, I sewed up the top.
It is attached to the shoulder with velcro. I made straps of fabric to hold it to my arm. One around my hand holds the sleeve in place so it doesn't slide off.
The foam metal piece is just glued on with fabric glue. I also air brushed some shading on.

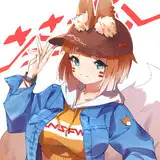
Headband
Ninja time! Its made with a front panel of non-stretch white fabric and green fabric that was satin-stitched on. The back of the headband is stretch fabric. It holds the headband on, while the green ties are just for extra security.
As with the rest of the foam details, its just glued on.

Wig
Yuffie's wig required no styling, and can just be coaxed into place and adjusted while wearing.
Easy!
That's it for my Yuffie cosplay. I hope this helps!